Showing posts with label Mains/Sides. Show all posts

Friday, February 28, 2014

Sweet Potato "Nachos" - A Texas recovery food

Zack and I recently returned from a wickedly delicious trip to Texas for our 9th anniversary.  When you tell people you are going to Texas for your anniversary, you get some wierd looks and a lot of "hmmm, what made you choose THAT location?"  Well, let me tell you.  We visited Austin, San Antonio and the Texas Hill Country and had an epic foodapalooza!  Not to mention the wonderful and unique sense of place that is only Texas and then again, each city and region is so individual too.  

In Austin, we wondered along South Congress and had a very rare experience for us.  Enjoyable shopping!  Very interesting stores - local and well curated and no chains.  We both got some new duds that we're really happy with.  Our dining over 3 days ran the gamut from the un-freaking-believable Trailer Park taco and Green Chile Queso at Torchy's Tacos, to the refined and delicious Japanese flavors at Uchiko, to spending 3 hours in line for the alledged best BBQ in Texas at Franklin  Certainly incredible, the best I've had!  Highly recommend all these experiences.  We also had one of the best burgers of my life at a strange Zombie dive bar on the 6th street promenade.  Casino el Camino's Amarillo burger will be burned in my taste memory for a very long time.

In San Antonio, we stayed on the absurdly touristy but still mildly pleasant Riverwalk. 
San Antonio is home to massive amounts of Tex Mex and Mexican food and lots of it is mediocre from what I've been told.  Fortunately we had great recommendations from a friend and hit up Soluna for phenomenal enchiladas and Acenar for nachos.  One of our favorite spots in San Antonio is the Pearl complex, home of the Culinary Institute of America San Antonio.  Great shops and restaurants and a Saturday Farmers Market.  Kinda felt like being in the Bay area actually.  I also ate a ridiculous muffin top at Broadway Daily Bread.  Late nights were all about the downstairs lounge at the Hotel Havana.  So dark and sexy that I could barely see the Banana Bread French Toast with Cajeta ice cream and caramel crusted pecans that I ordered for dessert.  That's okay.  I could taste it.  and it was transporting.  

Hill Country Texas is home to something you may find surprising.  Wine Country - and lots of it.  We meandered the adorable main street of Comfort, Texas and tried Bending Branch Winery's tasting room.  The Tannat grapes in the eponymously named wine they make are grown only in Texas and is deeply reminiscent of raisins and finished for days.  Each sip of this wine was slightly different and not always pleasant, but quite an experience. Enough to check a bag so we could bring home a bottle. Fredricksburg is just 30 minutes from Comfort and lined with dozens and dozens of Texas style shopping and restaurants.  Too touristy and busy for our taste but fun nonetheless.  The Museum of the Pacific War there was incredibly well done.  We didn't even go in and we were impressed.

Overall, Texas, we do heart you, and look forward to returning one day.  

Now, I'm sure you're not confused about why I'm eating sweet potato nachos today.  Texas was not kind to our waistlines.  All worth it, but I came home truly craving vegetables and nothing but.  Still craving those Tex Mex flavors though, I took some inspiration from a great recipe from my friend Ashley and we've eaten it twice in a week.  They are really delicious.  I would honestly rather eat them than regular nachos.  At least this week.  Give um a try!

Sweet Potato "Nachos"
Serves 2 for a main course and 4 as a side

3 large sweet potatoes
1 tablespoon olive oil (or more if you want)
kosher salt (I like a lot of salt)
1 can black beans (or skip these if you wish)
1 garlic clove
1 teaspoon ground cumin
Pickled red onions
Pickled Jalepeno
Greek yogurt or sour cream
Chopped Cilantro
Pepitas
Cojita cheese, if you wish

Preheat your oven to 425 degrees.  Line a large baking sheet with parchment paper.

Cut the sweet potatoes in half lengthwise and then crosswise and then into skinny wedges.  Toss with 1 tablespoon olive oil and 1 1/2 - 2 teaspoons kosher salt.  Spread on baking sheet and baked for about 45-50 minutes, turning once.  They should be soft inside and crispy and brown in parts outside.  Feel free to broil them for a couple minutes at the end if you want more crusty bits.

While they are roasting, make your black beans.  In a food processor, dump a can of drained, rinsed beans, 1 garlic glove, 1 teaspoon cumin, 5-6 pickled jalepenos, a generous pinch of salt and whatever else you'd like.  Puree to a desired smoothness.  

To serve, warm the beans and split them between two plates. (or serve them family style on a platter). Top each with half the roasted sweet potatoes and sprinkle (in whatever quantity you desire) with pickled red onions, jalepenos, sour cream, cilantro, pepitas and cojita, or honestly, WHATEVER you want!  Enjoy!


Friday, October 4, 2013

Fall Flavors: Chanterelle, Leek and Speck Pizza


I'm working on a project right now that asked me to share a signature dish.  I had a a big ole moment of pause about this, because I feel like I'm always moving on to new things and not settling on any one signature.  Zack had no such hesitation however.  Pizza!  Pizza!  And you know, he's right.  Not any particular pizza, but just really good pizza, using whatever is currently inspiring.  Pizza is a palette for so many possibilities.  Right now, chanterelles are in season.  Don't miss the opportunity to cook with this rich early mushroom while you can!!  I made this pizza the other day with leftover ingredients from a day of recipe testing and then recreated it for my project.  It really is so absolutely delicious that I had to share!

Chanterelle, Leek and Speck Pizza

1 ball of pizza dough, rested and risen.
1/2 cup ricotta (homemade if you have 10 extra minutes - its so amazing)
2 tablespoons butter
8 ounces chanterelle mushrooms, brushed clean and roughly chopped
1/3 cup thinly sliced leek rounds, the white or pale green part only
4 very thin slices of speck (a smoked cousin of prosciutto)
5 fresh chives, chopped in 1 inch pieces
parmesan
extra virgin olive oil
fresh cracked black pepper

An hour before dinner, place an oven rack on the top rungs of your oven.  If you have a pizza stone, place it there.  Preheat your oven to 475 degrees.

Thirty minutes before dinner, add butter and a drizzle of olive oil to a skillet over medium high heat. Add your chopped mushrooms, a generous pinch of salt and freshly ground pepper and allow to cook for ten minutes, stirring only once or twice.  You want nice browned mushrooms, so let them sit and don't fuss with them too much.

Meanwhile, with nice floured hands, form your pizza dough into a round, stretching or rolling it to desired thinness.  Dust a pizza peel with corn meal and place your dough on the peel.  Spread with ricotta, add leeks and cooked chanterelles.  Grind some fresh pepper over and drizzle olive oil.

Slide your pizza onto the pizza stone with a quick motion.  If you've used plenty of corn meal it will slide right off onto the hot stone.  Alternatively, you could bake this on a baking sheet.

Bake for 5-7 minutes at 475 degrees.  Then turn your broiler on high and broil for 2 minutes, then using tongs or hands with oven mitts, rotate your pizza front to back and broil for another 1 minute.  Remove from oven when its got some nice dark color.

Finish immediately with the thin slices of speck, finely grated parmesan and a drizzle of olive oil. Sprinkle with fresh chives.  Serve hot or at room temperature.

Saturday, February 16, 2013

Fennel, Apple, Dill & Cheddar Salad with Walnut Vinaigrette

This past week, I attended "Foodie" book club, which was recently begun by my friend Daytona.  The idea is, we read a book that has ties to culinary life in some way, and get together with like minded people to eat dinner and discuss.  At group, we talked about the months book a bit, but mostly we settled in like familiar friends (though most of us had never met) to topics of all things life; backgrounds, relationships, foods, recipes, meals, etc etc.  It was a total delight.

Daytona had asked us to bring foods that represented something about us and where we've come from.  I puzzled about that for awhile.  My culinary "heritage" is a place I find myself very far from these days.  A box of fish sticks and a bag of French fries didn't seem an inspired choice.  Not that I didn't eat well growing up...sometimes.  My Mother had many solid dishes and really introduced me to the kitchen in a loving way that I still treasure, but with five kids and a very tight budget, things were simple.  She made spaghetti, stir fry, swiss steak, homemade pizzas and stroganoff sandwich, to name a few favorites.  But my ideal foods came from a box.  A dream day of eating for me would have been a bowl of Lucky Charms for breakfast, followed by a bowl of Trix for elevenzies, a mayo soaked tuna fish sandwich studded with potato chips for lunch, finished off with a Twinkie.  For dinner, Gino's frozen pizza, followed by Tollhouse cookies (first the dough and then warm from the oven) and ice cream.  I had an appetite for the junkiest of things.  So, as a result, by the age of 19, I was nearly 200 pounds and very unhappy.  One day, enough was enough and I vowed to change.  There is a great deal to the story, spanning many years, but lets just say I did.

As I thought about foods that represent me now, I kept coming back to salad.  The thing is, I bake and cook constantly, but when it comes to every day eating in our home and life, salad looms large.  I have learned to crave and value vegetables and love the creativity of "making up salads" - always heavily influenced by what I'm seeing around me.  I don't look like that girl of 19 anymore.  I temper my love of decadence with a stewardship of my body that I didn't understand back then.  I run often, drink tons of water, eat healthy and thoughtfully 80% of the time, and 20% of the time, I don't fret about it.  I'll never be a stick (and I am finally at peace with that), but I'll never be that 19 year old girl again either.  Here's the salad I brought to book club.  It was delicious.
FENNEL, APPLE, DILL AND CHEDDAR SALAD WITH WALNUT VINAIGRETTE
Serves 4

1 large head fennel, sliced in half, cored and sliced VERY thin, preferably on a mandoline
1 granny smith apple, julienned
1/4 of a red onion, sliced VERY thinly
3 oz Beecher's flagship cheddar, or other great aged cheddar or gruyere, grated
1/2 cup chopped fresh dill
1/2 cup chopped fresh Italian parsley (optional)
1/2 cup toasted walnuts, roughly chopped
Maldon sea salt (optional)

Toss these ingredients together in a medium bowl, with dressing enough to moisten all but be careful not to overdress.  It's nice to toss this salad 15 minutes or so before you eat it.  Finish with some nice flake salt like Maldon.

WALNUT VINAIGRETTE
This recipe is adapted my dear friend Ashley - she taught it in a recent class and I love it.  Note that this recipe makes about 1.5 cups vinaigrette, which would be enough for quite a few salads.  Store in the fridge.

1 cup orange juice
1 small shallot
1/3 cup sherry vinegar
1/3 cup toasted walnuts
1 tablespoon Dijon mustard
1-2 teaspoons honey
1/2 - 1 teaspoon salt (start with less)
1/2 cup olive oil

Heat the orange juice to a boil in a small saucepan. Reduce to 1/2 cup, then remove from heat and cool.  Toast the walnuts and cool.  Peel and roughly chop the shallot.

Put the reduced orange juice, shallot, sherry vinegar, 1/3 cup of the walnuts, and Dijon mustard in the blender. Season with salt and pepper. Blend at high speed until homogenous.

With the blender running, add the oil slowly. Do not let the blender run too long, as the vinaigrette will break if it gets too warm.

Taste the vinaigrette to adjust the seasoning. Add more salt or pepper if needed. If the vinaigrette is too acidic, add more oil with the blender running. If the vinaigrette gets too thick, thin with a bit of water. 

Thursday, June 7, 2012

Raquelitas Carnitas


Me and a pork shoulder get along real nice.  It is one of my favorite cuts of meat to work with. Something about the whole process of marinating then slow roasting until the collagen breaks down into silky, savory, deliciously pull apart tenderness is thoroughly satisfying to me.  I imagine similar to how a potter might feel when they mold a tough chunk of clay into a beautiful platter ...to serve carnitas in.  It is a rewarding lesson in patience and understanding of the cut of meat that you are working with. You want the fat in the shoulder (or butt) but not too much. These are best purchased from a butcher. You say, "Hi, I'm making carnitas. I need a good solid four pound pork shoulder nicely trimmed please." Or you could even say, "Hi, I'm making carnitas for six people. How big of a pork shoulder should I get?  Can you trim it if needed for me please?"  These butchers are meat people.  They like to talk about it.  Don't be shy!  I have learned so much from my butcher.  Let them do their job.  Who cares if you don't know what you are talking about?  If you ask the butcher to trim the excess fat, you won't be paying for the fat you would be trimming later on at home.  And while I'm going on about this, get the clean stuff if you can. Natural and sustainably raised pork is always a good idea for health reasons and the taste is so worth the extra few dollars. Hormone free meat is so much more appetizing! 

The traditional way to make "little meats", as the word carnitas means in Spanish, is to fry them.  This particular method gives you the result of the crispy browned and caramelized bits that you want but without the frying.  The simple marinade is reduced into a syrupy glaze and mixed into the meat and broiled for the perfect sweet and crispy texture.  If you want even less fat, you can place the pork on a cooling rack (the kind you rest hot cookies on) on top of a baking sheet so the fat drips down.  Take it to it's limits but stop the broiling before it begins to char. 

There are many ways you can enjoy carnitas.  For our Southwestern cooking class, we served these on Navajo fry breads with New Mexico red chili sauce and all of the regular taco condiments like cilantro, radish, lettuce, cotija cheese.  You can serve them with tortillas and your favorite salsa and guacamole.  Whatever you decide, don't forget a squeeze of lime.

RAQUELITA'S CARNITAS

Serves 6

1 (3 ½ lb to 4 lb) boneless pork shoulder, fat cap trimmed to ⅛ inches thick, cut into 2 inch chunks
1 small yellow onion, peeled and roughly chopped
2 bay leaves
1 tablespoon dried Mexican oregano
2 teaspoons ground cumin
1 teaspoon garlic salt
1 teaspoon kosher salt
1 teaspoon fresh cracked pepper
1 organic orange: the juice and the peel
1 organic lime: the juice and the peel

Combine all ingredients in dutch oven. Stir well to coat the pork. Let marinate overnight in the refrigerator.

Preheat the oven to 300 degrees with the oven rack in the lower-middle position. Add 2 cups of water to the pork mixture or just enough to cover the meet and bring to a boil on the stovetop while stirring occasionally. Cover the pot and transfer to the oven. Cook until the pork is soft and fork tender, about 2 hours. Stir the pork and remove the lime peels about an hour into the cooking.

Remove the pot from the oven and turn the oven to broil. Using tongs or a slotted spoon, transfer the pork to a large bowl. Remove and discard the orange halves, the onion and bay leaves from the cooking liquid. Do not skim the fat. Place the pot over high heat and reduce the liquid down to a syrupy consistency. Should take about 15 minutes at a boil and reduce down to 1 ½ cups.

Using 2 forks, pull each piece of pork in half. Fold in the reduced liquid and taste. Add salt and pepper to taste if needed. Spread the pork out on a baking sheet. Place the baking sheet on the lower-middle oven rack and broil until the top of the meat is well browned but not charred. Just until the edges are crisp, 5-8 minutes. Using a wide metal spatula, flip the pieces of meat and continue to broil until the top is well browned and the edges are slightly crisp, 5-8 minutes longer.

Friday, May 18, 2012

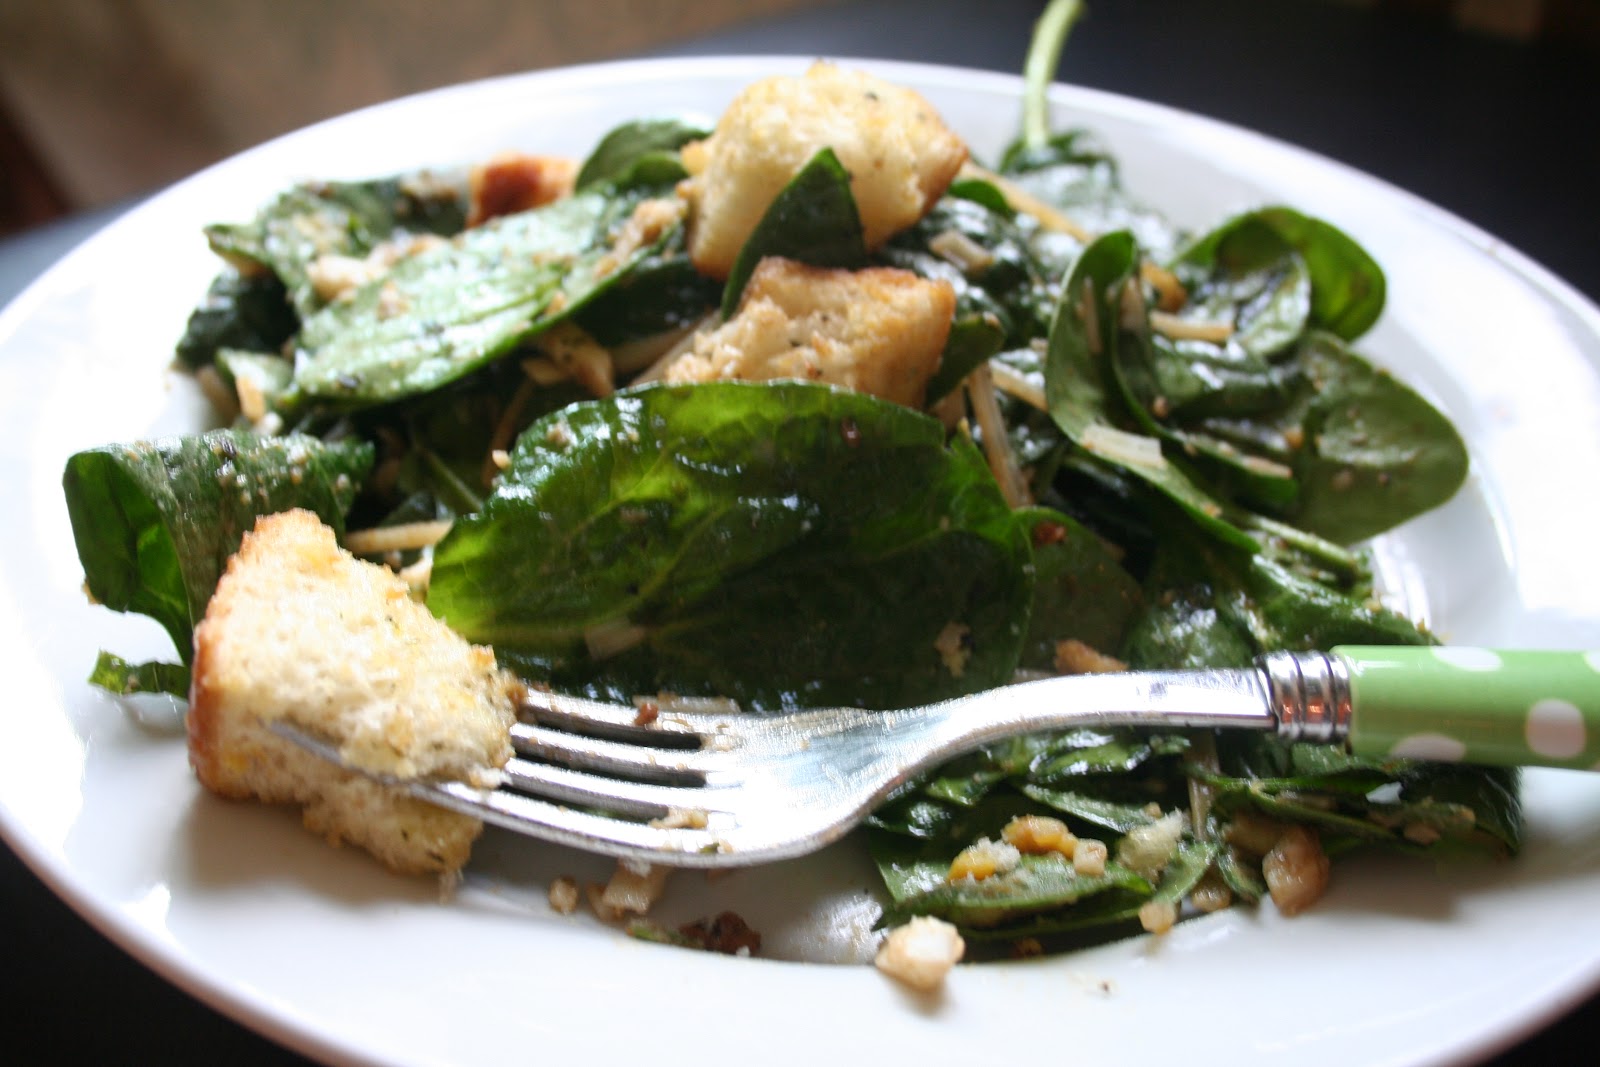
Spinach Salad with Garlicky Thyme Croutons

Yesterday was the staff appreciation luncheon at Scarlet's school. Even though it's been a very full week, I just had to contribute in some way.  I'm so glad that it happened to be a luncheon because one of my favorite ways to show somebody that I care about them is to cook for them.  It works well for me because the boys can be napping or watching Tin Tin and I can serve the community right here in my home by making something delicious that says "thank you for being more awesome than necessary and serving these children so tirelessly!" There is only so much you can say with a salad but it wasn't just the salad, it was the time making the salad. While I chopped and diced and sliced, I prayed for these people and the school.  Love and prayer are my very favorite ingredients these days.
Whenever I make this salad I always get asked for the recipe and like usual, I don't have it. That is a terrible habit and I'm so thankful for this blog because it has made me actually write stuff down while I cook so I can stop being a recipe hoarder.

This salad works perfectly for block parties, picnics or big potlucks. To prevent the spinach from wilting too much, keep the dressing in a jar and dress before serving. For more of a spread, grill some meat and bake up some delicious homemade macaroni and cheese.

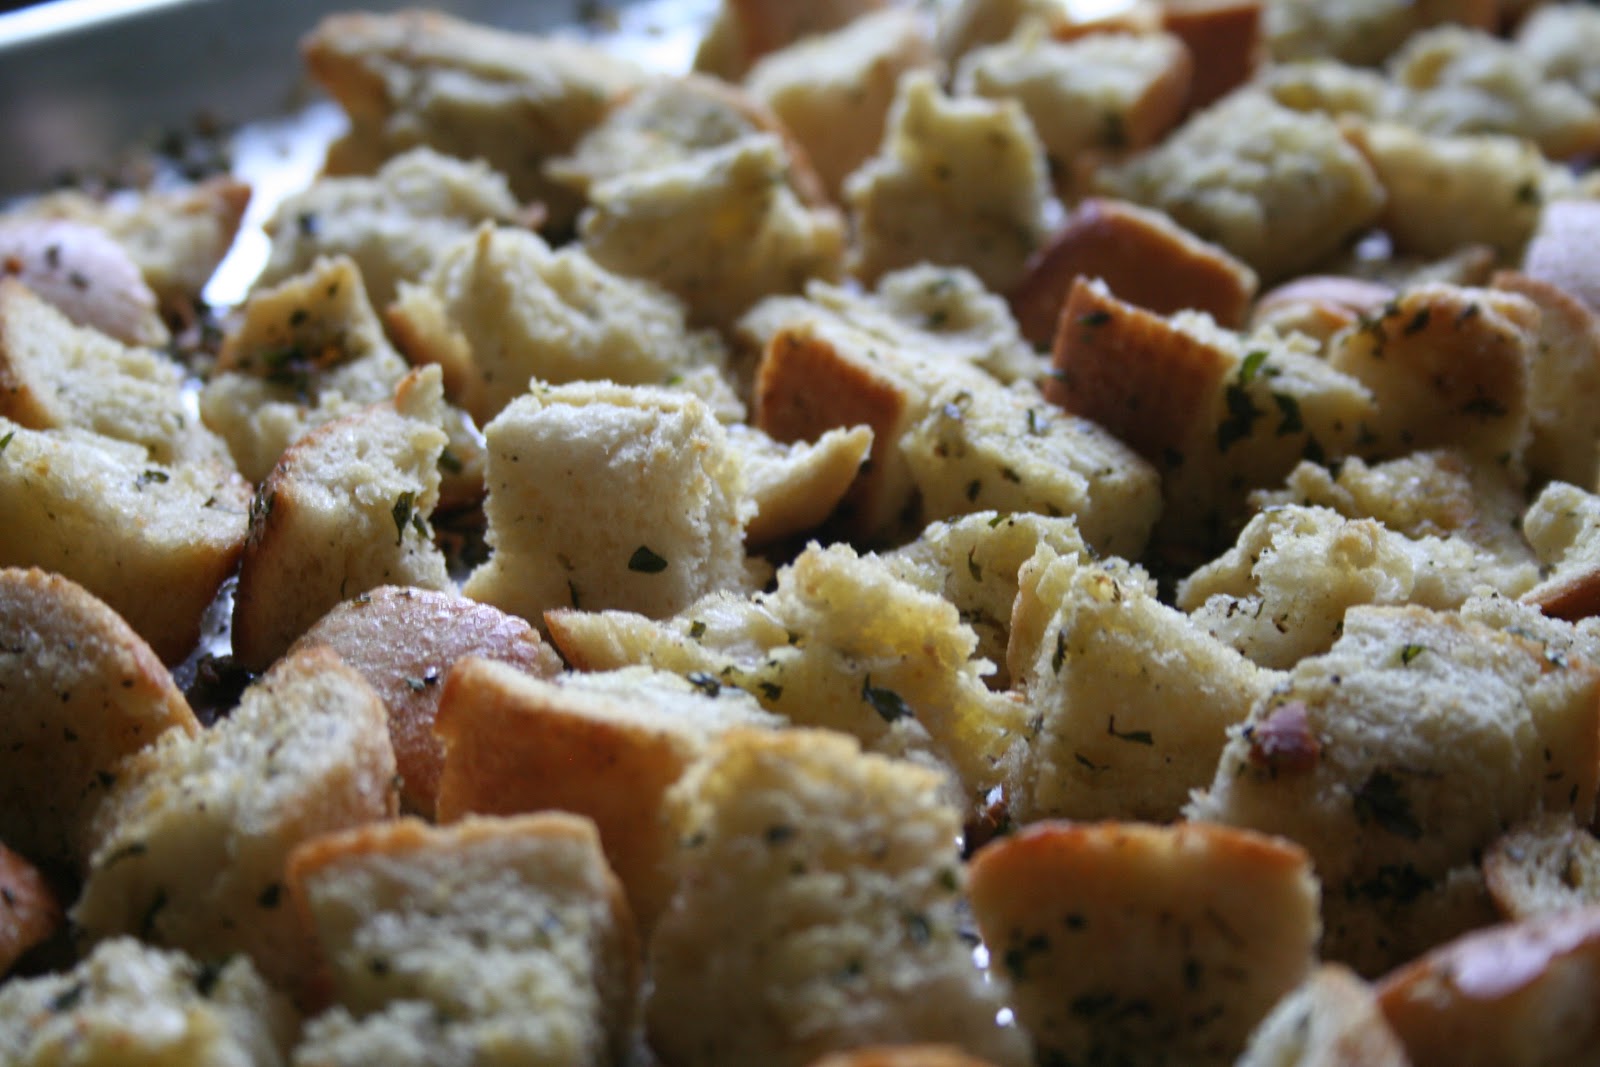
If you're in a hurry, this can be a super quick salad when you buy pre-washed spinach, pre-shredded parmesan and pre-hard-boiled eggs at Trader Joes. But do make the croutons at home. They are what make the salad so tasty! If you are being more health conscious you can use sprouted grain bread for the croutons or even gluten free bread. Any kind of bread should work well.

This serves about 10-12 people as a side and takes 35 minutes to prepare.

1 1/2 cups olive oil
6 tablespoons balsamic vinegar
6 cloves garlic, chopped
3 Tablespoons fresh thyme, chopped
1 long baguette cut into 1'' chunks

6 quarts washed spinach
5 large hard-cooked eggs, chopped or sliced
1 1/2 cups shredded parmesan cheese
1/2 cup fresh basil sliced thin
golden raisins (optional)
Course salt and fresh cracked pepper

Preheat oven to 375 degrees.

In a large bowl, coat the baguette chunks with 3/4 cup of olive oil, the chopped garlic, thyme and a generous amount of salt and pepper. Dump out on a baking sheet and bake until golden brown, about 20 minutes. Allow them to come to room temperature.

A fool proof way to hard cook eggs is to place the uncooked eggs in a heavy pan. Cover with about 1'' of water and bring to a boil. As soon as the water comes to a boil, turn off the heat or remove from heat source, cover and let sit for 12 minutes. Next, drain and rinse under cool water. Peel the eggs under a dribble of water from the faucet. The fresher the eggs, the harder they are to peel. We go through eggs quickly in our house so this is usually my messy outcome. Thankfully they will be chopped up!
In the same bowl that you tossed the croutons, make the dressing (or in a jar if you aren't going to serve immediately).  Mix the remaining olive oil, vinegar, salt and pepper.  Add the spinach and the sliced basil.  Scatter the eggs, croutons and cheese over the spinach.  Toss the salad and add more salt and pepper to taste.  If your balsamic vinegar isn't very sweet, add some golden raisins in to the mix.
I doubled the recipe so that is why there is so much in these photos. Enjoy!

Monday, May 14, 2012

Ridiculous Ribs pull Double Duty


The Joyful Kitchens catered a rehearsal dinner this past Friday and the menu was classic Americana (sorry Rachel - I know you hate that word ;)).  The centerpiece was crusty mahogony ribs, dry rubbed for 48 hours in brown sugar, chile powder, salt and other seasonings, slow-roasted for 3 hours and then finished on the grill, after a generous slathering of BBQ sauce and pan juices.  These ribs were special.  When you make something good you have to own it.  And I own that these ribs were special.  However, everything good I ever make is an inspiration from someone else, so I can only take a smidge of credit.  The inspiration this time is Lindy; an amazing cook, Mother of my best friend since kindergarten and part of a gourmet group we call Cinq Gourmandes (a little ode to Julia Child).  Anyway, thank you Lindy!   Folks, I'm just telling you, these are great and your family will thank you for them.  The guests at the rehearsal dinner were delighted and I also made them for Zack's guys night on Saturday, where they were devoured with equal aplomb.  Being a multi-tasker, I basically made the same menu for both events, saving me lots of shopping time and brain-space.  Anyway, the ribs were a hit at both and I wanted to share.

Sometimes I have a hard time figuring out how to weave a story together.  Writing is not my primary gift by any means.  But I do like to share delicious things with people and also my observations about this and that, so this time I'm going to go ahead with List form.  LISTS are definitely one of my primary gifts. :)

Some observations...

1) About photography:  I sometimes kick myself for not taking more care with pictures or learning more about this element of blogging.  For heavens sake, one of The Joyful Kitchens is one of the best food photographers I've seen!  Ashley would help me in a minute if I wanted to improve.  But the thing is, while I like to capture at least A picture of the food, its just not a huge priority for me.  I don't have any ambitious ideas about this blog so I'm not worried if my images aren't always awesome.  I hope friends and family read and enjoy it.  It is a collection of recipes and stories and it is a place for us to keep in touch with you about our classes and events.  My true passion is cooking food and serving people, not writing about it.  So please forgive the lack of epic imagery.  I hope the recipe content makes up for it.  I will try to be vigilant about them being excellent and only post things that are really really special.  I know the other ladies will do the same.

2) Guys nights:  What do you think of when you hear those words?  Pizza Hut, PBR, bags of cheetos?  Well, I've had kind of a revelation about them this year.  It started with my pondering the reality that me and my girlfriends get together regularly (many different combinations of them) to eat really really well.  We cook for each other, plan menus and really make our girls nights delicious and memorable.  Guess what?  Guys really really like this too!  But most of them (I said most, so please don't get all up in arms if you're a guy that loves to cook!) don't have the cooking experience, culinary tools, or menu imagination to make a meal with each other really special.  Zack used to have guys nights with pizza ordered in and all that, but recently I've discovered that one of the greatest gifts I can give him is a wonderful meal with his guy friends.  They actually seem to enjoy doing the finishing steps, plattering everything up and sit down to an awesome menu of items at a well set table.  Zack loves to be able to host them in this way and its a joy to help him do it.  So, in conclusion on this topic. 1) We're going to do a guys night cooking class coming soon - to teach the guys a menu that they can really get excited about making and enjoying with their "bros".  Email julie@thejoyfulkitchens.com if you want me to make sure you hear about it first.  2) If you're a woman who enjoys cooking, consider helping your husband put together a great guys night menu and help or do the cooking and let him finish it.  It's a gift.  I always leave a list of instructions and scoot out the door before the guys show up!

3) The cookbook giveaway!  I put your names in a bowl and Zack randomly drew one.  Donna!  You're the winner!  I'll mail your cookbook pronto!

So now, for what you you'd really like to know.  HOW do I make these ribs!  Well here you go.  I need to give you the recipe for the Bourbon Apple Fritter Cake they had for dessert too, but that will simply have to wait.  I didn't even get ONE picture of that.

SPICED BABY BACK RIBS
Adapted & Inspired by Lindy McDonough
serves 6-10, depending on how many sides you offer and appetite of guests

1 1/4 cup dark brown sugar
2/3 cup chile powder
1 tablespoon garlic powder
1 tablespoon chinese five spice powder
1 tablespoon cumin
3 tablespoons kosher salt
3 racks of meaty baby back ribs (Costco sells packs of 3 and they are amazing - super meaty)
2 cups of your favorite homemade or storebought BBQ sauce (I use Bullseye and it rocks)
2 tablespoons apple cider vinegar
1 tablespoon liquid smoke

1-2 days before you are going to serve the ribs, make the rub by combining first six ingredients.  Seperate out about 3/4 cup of the rub to add to the BBQ sauce.  Cut your rib racks into 3 or 4 rib sections.  Each rack should yield 4-5.  Rub the meat with the rest of the rub - about 1 1/2 cups.  Very generously on the meaty side and some on the bone side as well.  Place them meaty side up in the roasting pan (or other container that will fit in your fridge), cover with tin foil and place in your fridge for 1-2 days.  I like two days best.

For the sauce, add the BBQ sauce, apple cider vinegar, liquid smoke and the rest of the rub into a medium sauce pan and warm it slowly until the flavors come together.  Over medium low heat for 20 minutes or so.  It's ready to use now, so you can refrigerate till you need it.  OR, just make it the day you roast the ribs. 

4 hours before you are going to serve the ribs (you can even do it much earlier and warm them again in the oven before putting them on the grill) place them in a 300 degree oven.  Roast for 3 hours.  Check them then.  You should be able to easily slip a fork in and turn it and feel that it's tender and loosening from the bones.  3 hours seems about perfect in my oven, but a little longer might be good too.  Once its ready, remove the foil and leave on the stove-top to cool a bit.

20 minutes prior to serving, preheat your grill to around 300 degrees.  While its heating, baste the ribs thickly on both sides with your BBQ sauce.  Grill over medium heat for 5 minutes per side, or until the sauce has kind of baked on.

Serve with extra BBQ sauce for passing and plenty of napkins!


Thursday, April 26, 2012

A Salad for Sophia Rose

It has been a joyful week.  I traveled to Phoenix with my Mom to meet my first blood niece, Sophia Rose.  I'm honestly not someone that connects naturally with babies.  Their lack of ability to carry on meaningful conversation and total disinterest in whats whats for dinner (beyond milk, milk and more milk!) seems to create a barrier to intimacy that I'm still figuring out.  :)  But Sophia, she is somehow mine, having claim to her in whatever special way an auntie does.  That connection deepened by the significance that she came forth from my oldest brother Peter and his wife Suzan, whom I dearly love.

From childhood and on through my twenties, my brother and I had first a conflict-filled and then a remote and distant relationship.  Perhaps because we have incredibly different personalities, but I'm sure compounded by the reality that we haven't lived in the same state for the last twelve years.   But over the past two years we have had some great times, talks and adventures that have chipped away at years of neglect.  Spending this time with him as a new father felt like a milestone in that progression.  He is so tender and generous, involved in every aspect of my nieces young life without intimidation.  I know she'll have the very best he can possibly give her.  He'll have spent hours and hours researching exactly what that is!  If I'm ever blessed with a child, I will certainly have him on speed dial as to the safest car seat, the strongest diaper, and so on.  I'm sure he'll have recipes for baby food to share (he also loves to cook), and he's already taught me an amazing way to sooth, involving a swaddle, side jiggle, shushing sound that worked like baby whisperer magic.  I feel closer to and more proud of him than I ever have and I look forward to not only getting to know my new niece, but building on that relationship with my brother.  I want to understand how to love him better than I ever thought I could, and our conversations on this trip will help me to do that.  The older I get, the more I find joy in knowing my brothers as adults and seeing the seasons of their life and how they mature through them.  What an enormous blessing!

In between talks, baby jiggling and watching family home movies, my Mom and I did a lot of cooking for the new parents.  We wanted to fill them with health and home-cooked love while we were there.  I've been wanting to make a grown up version of the "Chinese Chicken Salad" that we grew up eating often.  It was such a childhood favorite that I made it the focus of my very first cooking demonstration, a 4H state fair show in 4th grade!  So, one evening of our visit, I assembled this salad and we carried it down to the pool cabana at their home,  enjoying the cool relief of the evening hours on a day that hit a 104 degree high!  Though far from its original recipe, the nostalgic flavors are there.  This salad is a truly delicious meal that will leave you feeling satisfied, but clean and healthy too. 


ASIAN CHICKEN SALAD WITH SESAME GINGER VINAIGRETTE
Serves 4 as a main course


I highly recommend you serve this salad with this Coconut Cilantro RiceHonestly, they go perfectly together!


6 cups baby spinach or 1 large head butter lettuce, chopped
1 head napa cabbage, chopped
4 medium carrots, peeled and sliced thinly or julienned
4-5 scallions, chopped
3 cups snow peas, chopped
1 cup chopped cilantro
1 cup slivered almonds, toasted
4 boneless, skinless chicken thighs or 2 large breasts, seasoned, grilled and chopped
1 mango, sliced thinly
2 ripe avocados, thinly sliced
1 cup chow mein noodles or strips of fried wonton wrapper (I skipped this to keep it clean)

For dressing

1/3 cup rice wine vinegar
2 inch section peeled fresh ginger, roughly chopped
2 garlic cloves, roughly chopped
2 tablespoons brown sugar or honey
1 tablespoon soy sauce
2-3 teaspoons toasted sesame oil
1/4 cup extra virgin olive oil
3 tablespoons toasted sesame seeds

In a blender, process together dressing ingredients through olive oil until smooth.  Pour into a bowl and stir in toasted sesame seeds.

Toss salad ingredients together through cilantro.  Top salad with sliced mango, avocado, chicken (forgive the picture, I added the chicken after) and toasted almonds in a decorative fashion and drizzle top with all the dressing.

Thursday, November 19, 2009

Suzi's Roast Turkey


My mother-in-law is a wonderful cook and gracious hostess. She not only makes delicious things but she is unfailingly generous with her skills. She makes many things, especially for the holidays, which I look forward to every year. I'll be posting at least one more of these in the coming month. A few years back, I had her roast turkey for the first time and was totally hooked. But it seemed somewhat complex and while Thanksgiving is my favorite holiday and I plan for it with a passion bordering on the absurd, the bird is never my greatest focus. I think I was pretty resigned to it being a little dry and a little bland no matter what concoction I rubbed it with, injected it with and so forth. Suzi's turkey however, had a truly moist breast. That is the part I most remember and desired to replicate. Moist, more like cutting into beef tenderloin. Perhaps time has caused the memories to plump a bit, but I'm confident that her bird was the best I've had.

So, for my bi-weekly women's Bible study/dinner party the theme was Thanksgiving Test Kitchen and I decided to give Suzi's bird method a try. It really is a method more than a recipe and I thought the results were excellent. First, a couple things you should know. One - it wasn't as good as hers, but it WAS moist and better than any bird I personally had made before. Two - This is no fancy free-range fresh turkey. This was an 11 lb, 27 cents a lb bird from Safeway. I am not about to spend $60 on a fresh expensive bird when I can get one for $2.97 and it tastes this good. I know, how terribly NOT politically correct I am! Not that I have any problem with those that buy the expensive boutique birds, but I'll do my eating local from the produce table at my Farmer's market, where I can really taste the difference in the end product and it doesn't break the bank. Okay, back to the matter at hand.

First, start by soaking your turkey in brine. For the science behind why this is a great idea, check this out, but simply, brining your turkey forces salt and flavor into its cells, which allows the turkey to be flavored from the inside and not just during roasting with whatever you put on or under the turkey's skin.

Full-Flavored Roast Turkey
Adapted from USA Weekend magazine, from Suzi Hubert's warm and cozy kitchen.

Start this process 15-18 hours prior to roasting. And don't forget to put your turkey in the fridge 48 hours before that, if it's a frozen one. The total roasting time for a 11 - 14 lb turkey by this method will be 2.5 - 3 hours. Do not stuff your bird, it will dry it out and extend the cooking time by quite a lot. Allow 25 minutes for the bird to rest before carving. Don't cover it when its resting! It will decrease skin crispness and cause it to overcook.

Special Equipment: A roasting pan with a V-rack (easy to get at Fred Meyer, Target, all over) and a meat thermometer

STEP 1: Turkey Tea - Here is the one divergence I did from Suzi. Adds more flavor to the brine.

20-25 black peppercorns
3 bay leaves
2 tbl dried thyme
2 tbl fresh sage
2 cups boiling water

Allow the herbs to steep in the hot water for 30 minutes or so.

STEP 2: Brine

1 1/2 cups kosher salt
3/4 cup sugar
1 1/2 gallons of cold water
Turkey Tea
1 turkey (thawed, giblet bag, neck and tail removed)

Mix water, sugar and salt together until dissolved. Add your cooled turkey tea and your turkey - breast side down. You'll need a 5 gallon bucket or very large stockpot for this. Put this in fridge now for 15-18 hours. OR, like I did, pour 2 cups of ice over the turkey and put it in your garage if you're doing this overnight and the temperature is going to be 45 degrees or below. Cover the pot and don't worry, it will be fine.

STEP 3: Roasting

Remove your turkey from the brine, rinse thoroughly with cool water and pat very dry. Preheat your oven to 400 degrees and place oven rack on the lowest position.

2 medium onions, coarsely chopped
1 carrot, coarsely chopped
1 celery stalk, coarsely chopped
3 tbl butter, melted
grey salt or kosher salt

Loosely stuff the cavity with 1/2 the chopped onion, carrot and celery. Scatter the rest on the bottom of the roasting dish under the V-rack. Add 1-2 cups of water to the pan, depending on how large it is. This helps the vegetables not burn. They are there to improve the flavor of the drippings.

Tie the turkey legs together and secure the wings, with kitchen twine wrapped around the bird. Now, place V-rack in the roasting pan and place turkey breast side DOWN, on V-rack. Brush back and sides with melted butter. Sprinkle generously with grey salt and fresh cracked pepper. Place in oven now and roast for 50 minutes.


Remove pan from oven, close oven door. Baste turkey's back with drippings. Now, with two towels, turn the turkey until it is on its side with one leg and wing up. This is why you need the V-roaster. Brush the exposed side with melted butter. Sprinkle generously with grey salt and fresh cracked pepper and place it back in the oven for 20 minutes.


Remove pan from oven, close oven door. Turn the turkey over so the opposite side is up. Brush the exposed side with melted butter. Sprinkle generously with grey salt and fresh cracked pepper and place it back in the oven for 20 minutes.

For the third time, remove turkey from oven, close door. Turn turkey breast side up and baste with drippings, melted butter and sprinkle with grey salt and fresh cracked pepper. Roast for 40 more minutes.


Remove the bird and check its temperature with a meat thermometer into the breast, but not all the way to the bone - just right into the meat about 1 inch down. You are looking for a temperature of 162-165. When you are there, remove the turkey and let rest. If you are not, put it in for 5-10 more minutes depending on how far you are away.

NOTE: My cooking times were for a 11 lb bird. Yours could very likely be bigger. You'll need to adjust, probably 30 minutes longer total time for a 14 lb one. The cooking of the turkey doesn't happen in a linear fashion. There is a point in the roasting of the bird where it starts to heat exponentially as it reaches doneness. So you could take it out after 2.5 hours and the breast could be at 150 and 15 minutes later it could be at 160-165, which is when you want to take it out. So watch it closely in the 15 minutes to ensure you don't overdo it. Use your kitchen timer!

As for serving portions, I think a 11 lb bird serves 8 people with plenty of back meat left for soups and leftovers.

The reasons for doing your turkey this way are many. The brining adds moisture and flavor, roasting it upside down keeps the most sensitive part of the turkey - the breast - from becoming overdone and too dry, and rotating the bird has the effect of establishing brown crusty skin all over the bird, which seals in moisture but also tastes delicious.

I hope someone gives this method a try, or I just spent way too much time retyping this recipe!

Thursday, November 12, 2009

Oaxacan Black Mole


For the second time, and quite possibly the last, I made this incredibly complex and time consuming dish. With its roots squarely planted in a Oaxacan (a region of Mexico) grandmother's cooking tradition, it has a way of making you feel like a martyr/saint when you make it. Perhaps this is no coincidence and mothers and grandmothers for centuries have been wielding their culinary power and racking up undying commitment from their families for going through this long and grueling process. More than thirty ingredients, four hours of chopping, frying, toasting, blending, straining, reducing and one disastrous kitchen later you have an immensely complex sauce and perfect to serve at your most authentic Mexican dinner party. And that is exactly what I did, for Supper Thyme this past Saturday.

The process really comes down to making four different purees. Counter clockwise, starting top left, these purees contain the following. First - roasted onion and garlic, banana, charred bread, oregano, canela, cloves and thyme. Second - tomatoes and tomatillos, Third - dried Pasilla, Chilhualces, Chipotle secco and Mulato chilies that have been toasted in hot oil and reconstituted in water. Fourth - blackened seeds from inside the afore mentioned dried chilies as well as deeply toasted almonds, pecans, sesame seeds and peanuts.


Once you have the four purees, you cook each one down until reduced to the consistency of tomato paste, then add the next and repeat this process. I know, it doesn't look appetizing, but you know what they say about judging, books, covers, etc.

After all purees are added in turn and reduced to a thick paste, Mexican chocolate is added. This special chocolate contains cinnamon, chili powders and other spices and is only slightly sweetened. The final step is adding stock to bring the sauce to a pouring consistency, season well with salt and a bit of sugar to mellow the toasty flavors just a bit.

After all this, my kitchen looked like all this.


So, you may ask, why bother? Well, for me, making this sauce was one of those things I needed to do in my culinary lifetime. I absolutely love the flavor but more than that it was a challenge to see if I could do it and do it well. I am satisfied, and honestly, I totally enjoyed my time in the kitchen. Cooking certainly shouldn't always be a rush to be done. I got to savor the process.

I won't type out the whole recipe here but if anyone wants it, email me at goldenpigletmail@gmail.com and I'll send you a copy straight from Rick's book.

Thursday, November 5, 2009

Pantry Weeks and Pizza Patate


This coming weekend is my husband's 35th birthday. Birthdays are a huge deal for him and I always try to plan something really special. A birthday that ends in a 5 or a 0 is particularly important and must be celebrated with extreme gusto. As I've mentioned before on this blog, he works incredibly hard and I'm taking him away in hopes he can really rest and relax. To make it more fun, I've kept our destination a surprise. I'm quite proud of myself, 8 weeks of surprise self control. :)

So, you might ask, how does this all relate to pantry and pizza? Well, knowing I'd be taking him out of town I decided I needed to be very budget conscious in the weeks leading up to the occasion. I'd heard of pantry weeks from many sources and after trying it, I highly recommend it. Basically, I cooked almost entirely from my pantry, fridge and freezer for two weeks, from stockpiles of frozen chicken, veggies, beans, stocks, canned tomatoes, hard cheeses and baking products. Of course you'll need some fresh items like milk and some veggies, but for the most part it worked out really well and I spent less than a quarter of what I normally do at the grocery store. I actually got a big kick out of this. It requires some recipe searching, modification and substitution, but it was a fun challenge. I also found that by making fresh breads I could elevate some pretty simple things to a nice meal.

Some of the items we had were vegetable risotto, Sourdough BLT's and beet salad, butternut squash curry, potato, bacon and corn chowder with buttermilk biscuits, tomato soup with chickpeas & Irish soda bread, and sausage & pepper calzones. Nothing fancy, but Zack and I were happy as clams and everything was yummy, though I certainly didn't feel inspired to blog. Pizza Patate changed that. What a case of something being more than the sum of its parts! It is creamy, crispy, savory delight. You must make it. I bet you have all the ingredients in your house RIGHT now. In your pantry.

Pizza Patate
Adapted from My Bread by Jim Lahey, reprinted in November 2009 Gourmet magazine.


Makes 1 large pizza, 8 slices. Serves 2-3 for entree OR cut in small squares for a great appetizer!

BASIC PIZZA DOUGH (you could use store-bought dough, but this is cheap and easy.

Start this 3 hours before you want to eat.

1 3/4 cups all-purpose flour
1 1/4 tsp active dry yeast
1 tsp kosher salt or 1/2 tsp table salt
1 tsp sugar
2/3 cup room-temperature water
extra virgin olive oil for the pan

1. In a medium bowl (I used my kitchenaid with paddle attachment), stir together the flour, yeast, salt and sugar. Add the water and mix until well blended. The dough is quite stiff, not wet and sticky. Cover the bowl and let sit at room temperature until the dough has doubled in volume, about 2 hours. Then, start the potatoes for the topping.

TOPPING

1 quart lukewarm water
4 tsp table salt
2 lbs russet potato (or any kind of potato you have)
1 cup diced red onion (or any onion you have)
1 tsp freshly ground black pepper
3 tbl extra virgin olive oil
2-3 tsp chopped fresh rosemary (I have this in my yard, if you don't, take a walk, you'll find some to "borrow")
Optional, but really adds a lot: 1/2 cup gorgonzola cheese (or whatever you may have in your fridge going unused - feta, goat cheese would be great here)

1. In a medium bowl, combine water and salt, stirring until the salt is dissolved. Use a mandoline or knife to slice the potatoes very thin (1/16 inch thick) and put the slices directly into the salted water so they don't oxidize and turn brown. Let soak in the brine for 1.5 hours at least, until the slices are wilted and no longer crisp.

2. Drain the potatoes in a colander and use your hands to press out as much water as possible, then pat dry with a clean dish towel. Now, toss together the potatoes slices, onion, pepper and olive oil.

ASSEMBLY

Preheat oven to 500 degrees and position a rack in the center.

1. Oil a 13 x 18" rimmed baking sheet. Scrape the dough across the surface of the pan, use you hands to press it evenly out to the edges. If the dough sticks to your fingers, lightly dust it with flour or coat hands with oil. Pinch any holes together.

2. Spread the potato mixture evenly over the dough, going all the way to the edges of the pan; put a bit more of the topping around the edges of the pie, as the outside tends to cook more quikcly. Sprinkle evenly with rosemary & a little kosher salt (not much, the potatoes are already salty.)

3. Bake for 18 minutes, remove and sprinkle with the cheese. Bake another 8 minutes until topping is golden brown and the crust is pulling away from the sides of the pan. Serve hot or at room temperature.

Tuesday, September 29, 2009

A wonderful weekend and Butternut Squash Curry

This weekend, Zack and I went away. His work has been intense for months and promises to be more so in the coming weeks. I decided an overnight outside of our normal habitat was needed. My friend and neighbor, Dana, writes often on her blog about Lopez Island. Over the past six months I have grown more and more convinced I needed to experience it for myself. As you might expect, it was her talk of the food sealed the deal. Honestly, its a beautiful island and I knew that, but if it didn't offer good eating, I wouldn't be tempted to go there. But, it does - a wonderful little bakery called Holly B's and a waterside restaurant called the Bay Cafe. In 24 hours on the island Zack and I arrived at the bakery for sustenance three different times (2 lunches and a breakfast) and were never disappointed - almond butterhorns, cinnamon rolls, unique pizza, cookies and more! Saturday evening we had a wonderful meal at the Bay Cafe. This isn't fancy food, but it is truly tasty and generous. We had dinner at 5:30pm and enjoyed the 3 course meal for $30 while sitting in one of the most beautiful settings I have ever eaten dinner. Al fresco, right on the edge of the water, 70 degrees, warm breeze, delicious unpretentious food and THIS view!


So, how does Butternut Squash Curry fit in? The thing is, that after a weekend like that, I feel relaxed and satisfied, but also a little roly-poly and post-vacation eating is in order. Enter this curry. I saw it in Martha Stewart's current issue of Living and it called to me. So healthy, full of favorite spices and butternut squash cooked until soft and soaked in flavor. 2 cups is extremely filling, packed with nutrients and fiber and only about 250 calories! And that's dinner! It could also be blended into a smooth soup if you prefer. Definitely top it with Greek yogurt or low-fat sour cream, a squeeze of lime and a shower of cilantro.


Butternut Squash Curry
Adapted from Martha Stewart Living, October 2009

2 lbs butternut squash, peeled halved and seeded
1 large onion, cut into large chunks
4 garlic cloves
2.5 cups chicken stock, plus 2 tablespoons
2 tsp olive oil
1 tsp mustard seeds
1 tsp fennel sedds
1/2 tsp ground coriander
1 two-inch piece fresh ginger, peeled and chopped
2 tbl tomato paste
2 tsp kosher salt
1/2 tsp crushed red-pepper flakes

Optional toppings: Cilantro, yogurt and lime

METHOD

Cut squash into large chunks, about 1 inch.

Puree onion, garlic, 2 tbl stock and ginger in a blender until smooth

Heat oil in a 4-quart pot over medium heat. Add mustard seeds, fennel seeds, and coriander and cook until fragrant, 1-2 minutes. Stir in onion paste. cook, stirring often, until caramelized lightly, about 12 minutes.

Add tomato paste, scraping bottom of pot if needed. Stir in 2.5 cups of chicken stock, the salt and crushed red-pepper flakes. Add squash, (liquid should cover 90% of squash at least) cover partially and bring to a boil. Reduce heat, uncover and simmer gently until squash is tender, about 20 minutes. Serve over rice if you want, but for lighter version, just eat as is with yogurt, cilantro and a squeeze of lime.

Tuesday, September 8, 2009

Poulet aux Julia Child


Julia Child has been getting a lot of notice these days and for good reason. By all accounts she was an incredible inspiration to cooking in America. I read her autobiography, My Life in France, about two years ago and was completely mezmorized by her journey - falling in love with a city, a country and a cuisine and allowing to to shape her destiny - meanwhile being a wonderful wife, loving friend and eventually a master of the craft I so dearly love as well.

I immediately bought Mastering the Art of French Cooking, her first and most famous cookbook and began to read it, filled with grand dreams of cooking from it regularly. But then I realized something. Most of her recipes just didn't appeal to me. I wasn't drawn to them at all. Aspics, meats in gravies and buttery creamy sauces, and cold desserts using gelatin galore. I am sad to say I was very put off and this epic piece of cookbookery (as she often called it) was placed on the shelf and left there to age.

Then, I received my August 2009 Bon Apetit magazine. Julia's birthday is on August 15th (or would have been - she passed away in 2004) and they had suggested a birthday dinner party in her honor, using recipes from Mastering. Each of the recipes looked delicious and I decided I needed to finally give her a chance. So, last week, I did. Let me just say that her Poulet saute aux herbes de provence (chicken with Provencal herbs) was so wonderful, so herbaceous, rich, and tangy that every drop of the sauce had to be sopped off the plate. If you are looking for an inexpensive and totally palette pleasing, soul satisfying dish to entertain friends or delight your family, look NO further. It seemed so simple, yet the result was far more than the sum of the parts. I adapted it only slightly. I note my adaptations in line. Oh, and I mean it, you must serve warm bread with this, unless you'd prefer to lick the serving platter.

Poulet Saute aux herbes de provence
from Mastering the Art of French Cooking (Julie - my adaptations listed like this in line)

Chicken:

1/2 cup (1 stick) butter
1 3 1/2 - 4 pound chicken, cut into 8 pieces, rinsed, patted dry
1 teaspoon dried thyme or savory (Julie - I used 3 tsps fresh thyme)
1 teaspoon dried basil (Julie - I ommitted this, I really don't like dried basil)
1/4 teaspoon fennel seeds, ground in spice mill/morter&pestle (Julie - I used 3/4 tsp)
3 unpeeled garlic cloves
2/3 cup dry white wine or 1/2 cup dry white vermouth


Sauce: (Julie - oh this sauce is amazing! You MUST use the fresh fennel fronds.)

2 large egg yolks
1 tablespoon fresh lemon juice
1 tablespoon dry white wine or dry white vermouth
2 to 3 tablespoons butter, cut into 1-inch cubes (optional)
2 tablespoons chopped fresh basil, fresh fennel fronds, or fresh parsley (Julie - I used 2 tbls chopped fresh basil and 2 tbls chopped fresh fennel fronds)

METHOD

For chicken:
Melt butter in large wide pot over medium-high heat. Working in batches, if necessary, add chicken pieces and cook only until golden (Julie - I recommend you cook them for the most part skin side down, thus rendering the skin fat and making it crispy), turning occasionally, about 8 minutes per batch. Transfer chicken breast pieces to plate. Sprinkle remaining chicken pieces in pot with half each of thyme, basil, and fennel seeds, then salt and pepper. Add garlic to pot. Cover pot; reduce heat to medium and cook 8 to 9 minutes. Sprinkle chicken breasts with remaining thyme, basil, and fennel seeds, then salt and pepper. Return breast pieces to pot; baste chicken with butter in pot. Cover and cook until chicken is cooked through, turning and basting occasionally, about 15 minutes. Transfer to hot platter; cover.

Remove peel from garlic cloves; mash garlic with spoon or fork in same pot (Julie - I used my garlic press). Add 2/3 cup wine to juices in pot; boil until liquid is reduced to 3/4 cup, occasionally scraping bottom of pan, about 8 minutes. Pour reduced pan juices into measuring cup and reserve for sauce.

For sauce:
Off heat, whisk egg yolks in heavy small saucepan until beginning to thicken. Whisk in lemon juice and 1 tablespoon wine. Gradually whisk reserved pan juices into eggs, 1 teaspoon at a time. Set sauce over very low heat and whisk constantly until warm and slightly thickened, 3 to 4 minutes. If desired, whisk in butter, 1 piece at a time. (Julie - I used 2 tbls butter here) Remove from heat. Stir in herbs, if desired. Season sauce to taste with salt and pepper. Spoon sauce over chicken and serve.

Monday, June 22, 2009

Father's Day Steakhouse


Zack and I have such wonderful Fathers. It doesn't feel like there is any way to fully express our gratitude for them. They are men of legacy, strength and unfailing commitment and love for their families.

We had the honor of hosting them both last night for Father's Day. It was really fun to have them together, something that doesn't happen often. Interestingly, they have a lot in common. They are about the same age and worked as counselors and public servants in one way or another as we grew up. They served in the Air Force during Vietnam, both as medics. My Father was stationed in the Philippines. One of his duties was x-raying and loading wounded soldiers onto air transports bound for United States. Back at home in Bremerton, Zack's Dad served unloading those same types of transport planes, sending the men to hospitals and surgeries once they had arrived back in the states for treatment. As they sat sharing stories I was just so humbled by the fact that they had shared such a painful experience, and that so many of our fathers and grandfathers have. Humbled and blessed by their sacrifice, though they never speak of it as such.

For this special dinner, I wanted to make some classic steakhouse favorites - real "Dad" food, so to speak. My Dad gets excited about a few foods. Among them, hot fresh bread and good butter, wedge salads dripping with blue cheese and ice cream in all its forms. Since all that doesn't really make a meal, I filled in the rest with some other things I thought they'd both love.

The menu:

Buttermilk Cornmeal Crusted Onion Rings
with curried ketchup


Iceberg Wedge salad
with heirloom cherry tomatoes, cucumber,
maytag blue cheese dressing and applewood smoked bacon


Bistecca Fiorentina or in English...
Herb Crusted Porterhouse Steak


Zack claims this was my best steak ever. I've made it about 5 times now and as with anything, practice makes perfect! The key is to get a real wet crust on the meat. Do this by making sure to follow the dry herb and salt rub with plenty of olive oil so that the rub is fully adhered to the to the meat. The oil reacts with the heat to ensure a deep dark crust. Just what you want! The meat within was tender and luscious.

Baked Dutch Baby Potatoes
with lemon thyme sour cream and snipped chives

Mini-baked potatoes essentially, but about the size of thumbs, so you don't fill up on potato. Equal portions potato to butter and cream. Wicked.

Julie's Hot Rosemary Bread
and Kerrygold Irish butter

and for dessert...

Dana Treat's INCREDIBLE
Peanut Brittle and Caramel Crunch Ice Cream Pie


I was so happy with how everything turned out. Delicious food and such great company. My Dad actually said it was one of the best meals he's ever had. After sixty plus years of meals, I have to say I highly doubt it, but it was music to his "little girl's" ears all the same.

I definitely want to share with you this awesome onion ring recipe, adapted from Ina Garten. The corn meal adds a wonderful crunch and sweetness. The real highlight of this appetizer was the addition of curried ketchup. The curry may be surprising but it takes this humble condiment to a whole new level. Try it with onion rings, fries, potato chips, burgers, whatever you put ketchup on.

Curried Ketchup

3/4 cup ketchup
1 Tbl curry powder

Mix together and taste. Add more curry powder if desired.

Buttermilk Cornmeal Crusted Onion Rings

2 large Spanish onions (or 3 yellow onions or sweet onions)
2 cups buttermilk
3-6 dashes of Tabasco (depending on the heat you like)
Kosher salt and freshly ground black pepper
1 cup flour
1/4 cup (medium) yellow cornmeal
1 quart vegetable oil

Peel the onions, slice them 1/2 to 3/4-inch thick, and separate them into rings. Combine the buttermilk, 1 1/2 teaspoons salt, 1 teaspoon pepper in a medium bowl. Add the onion rings, toss well, and allow to marinate for at least 15 minutes. (The onion rings can sit in the buttermilk for a few hours.) In a separate bowl, combine the flour, cornmeal, 1 teaspoon salt, and 1/2 teaspoon pepper. Set aside.

When you're ready to fry the onion rings, preheat the oven to 200 degrees F. Line a baking sheet with paper towels.

Heat the oil to 350 degrees F in a large pot or Dutch oven. (A candy thermometer attached to the side of the pot will help you maintain the proper temperature.) Working in batches, lift some onions out of the buttermilk and dredge them in the flour mixture. Drop into the hot oil and fry for 2 minutes, until golden brown, turning them once with tongs. Don't crowd them! Place the finished onion rings on the baking sheet, sprinkle liberally with salt, and keep them warm in the oven while you fry the next batch. Continue frying the onion rings and placing them in the warm oven until all the onions are fried. They will remain crisp in the oven for up to 30 minutes. Serve hot.


Sunday, June 14, 2009

Supper Thyme - Southern Style


What is Supper Thyme? Let me tell you. Supper Thyme is the most wonderful potluck you can imagine, where each guest brings the best from their culinary arsenal to compliment the meal. It is not haphazard. There is a specific theme and four or five courses. Two people are assigned to each and the normal formula is that a dish and paired drink is their responsibility. A theme is ESSENTIAL. This is similar in concept to the group of ladies I dine with quarterly, but it is really very different. That group is fixed - five ladies...the SAME ladies, every single time. Supper Thyme is a rotating band of wonderful food lovers, with each new dinner bringing some regulars and some newbies to the table. It happens sporadically, on average 5 times a year I'd say. We've done many wonderful themes, that you can check out here. To Supper Thyme you bring your very best. You research and test and you consult regularly with one another to ensure that the perfect meal is designed, or as close as you can get to it!

The Southern theme was probably the most discussed yet. Southern food is innately comfort food and there are so many elements of it that we wanted to experience. The issue was really narrowing it down to a reasonable amount of food that a reasonable human could eat in one evening. It didn't really make sense to do a lot of wine pairing with this meal, because cocktails and beers are more authentic to Southern meals, so we set up a fabulous bar and set out a couple recipes and people went to town. Fresh fruit old-fashioneds and whisky sours were the favorites.

It was a mind boggle. I am not 100% sure, but I am 95% sure that this was my favorite Supper Thyme yet. Here is the menu, with my comments.

~Cocktail Hour~

Fresh Fruit Old-Fashioneds

Crab Cakes Balls via Maryland

Spicy Pimento Cheese

Roasted Dates
wrapped in bacon and stuffed with Pecans


I wanted to pick one recipe from the evening to share with you and I chose the crab balls. The balls were so lusciously moist and filled with crab and the peppadew aioli a brilliant compliment. Really though, all the appetizers were amazing and the fresh fruit old-fashioned has turned me onto the possibilities of bourbon.

~First Course~ Plated

Sauteed Giant Shrimp
with country ham and andouille sausage
over the creamiest grits you've ever tasted in your life.


Oh Azie, these were so wonderful! There was much discussion over whether to have this course and would it be too much food and my oh my am I glad we did! These were the best grits I've ever eaten and the shrimp were perfectly spiced by the andouille sausage and smoky, salty ham. Delectable.

~Main Course~ Family-Style

Double Dipped Buttermilk Fried Chicken

Collard Greens

cooked with ham hocks

Blue Cheese Coleslaw


Southern Bread Basket:
Jalepeno cheddar cornbread, Country Bisquits

with honey butter


Okay, it was my job to make the fried chicken. Fried chicken is no easy matter. I tested a couple recipes earlier that day and determined a few key things. Don't add a bunch of smoky spices like paprika and cayenne to the chicken. It takes away from the pure flavor. Salt, pepper, garlic powder and dried thyme ended up being perfect. Another important thing is double-dipping for maximum crust. I mean, isn't that REALLY why we eat fried chicken? So, soaked in buttermilk for 24 hours, then dredged in the seasoned flour, then buttermilk again, then flour, then rest for 5 minutes and into 360 degree oil. 3 minutes per side and then 25 minutes in the oven. I am telling you, I was very proud of that chicken. Which made me feel better when the blue cheese coleslaw was totally a waste of space. Fortunately, the collard greens were amazing as were the breads. Seriously, my friends Beth and Tim killed it on the baking. I have never seen such tall, fluffy biscuits come out of a home kitchen.

~ Dessert ~
Served much, much later, standing around the kitchen

Rhubarb Peach Cobbler
with Buttermilk crust, topped with Buttermilk ice cream
garnished with Grilled Bourbon Peach & Bourbon Drizzle

Ah me, it is too much. An incredible meal and then THIS! It was so perfectly golden, with the proper ratio of topping to fruit that is crucial to a good cobbler. The rhubarb and peach were a perfect combination. Tart and sweet mingling together in a symphony of...okay, I'm losing it. Breathe, Julie, Breathe. This was Amy's first attempt at homemade ice cream and the flavor was perfect. The sweet tangy buttermilk came right through. The grilled peach and bourbon drizzle took this to another planet. Stop Julie, you're doing it again! Point being, I really liked this dessert.

So, back to that recipe I promised you. This is in Rachel's own words.

Crab Cakes Balls via Maryland
This recipe is inspired by my Mother-in-law Donna's crab cake recipe. I modified it to make it into crab cake balls which make a very special appetizer. For the record, it's more economical to buy the already shelled crab meat believe it or not. The monger at Central Market convinced me.

1 pound fresh jumbo lump crabmeat (splurge)
1 3/4 cups panko
4 large eggs beaten
2 Tbl olive oil (plus a bit more to coat the cookie sheet the balls are baked on)
1 Tbl butter
1/2 sweet onion finely chopped
2 large garlic cloves finely minced
3 Tbl mayo
1 1/2 tsp Dijon mustard
1 Tbl Worcestershire sauce
1 tsp hot sauce of choice (Iguana habenero)
1 tsp Old Bay seasoning
3/4 cup finely processed parsley
1 tsp fresh chives
Kosher salt
Fresh ground pepper

Process the onion and garlic together until very fine. Then, saute the onion and garlic in olive oil and butter until it gets caramelized and brownish. Break up the crab meat into smaller pieces that will mix well. Big chunks will not work well in a ball. Add to bowl. Add crab meat to bowl. Add all other ingredients to bowl and mix or fold together gently until everything is well combined. Do not over mix. Once combined, use a tablespoon measure to scoop out amount to mold into balls. Gently roll crab batter into ball and place on lightly olive oiled cookie sheet. Should make about 40 balls.

The balls need to set for at least a few hours to firm up before they are baked. This is a great recipe to make the day ahead and let them rest. Cover with plastic wrap.

Bake in middle of oven at 400 degree for 25 minutes.

Peppadew Pepper Aioli
1/2 cup olive oil mayo (more if you want the aioli thicker)
Juice of half a lemon
1 Tbl fresh chives
1/4 cup fresh italian parsley
about 5-7 peppadew peppers with juice (found in olive bars in finer grocers)
1 Tbl hot sauce of choice (Iguana habanero sauce)
Salt and fresh ground pepper to taste

Blend all aioli ingredients together in a blender. Serve with warm crab cake balls.
Don't forget the toothpicks. And chives with parsley make a lovely garnish. Enjoy!